Help
Signing up with 511 Alberta Creating & Saving a Customized Route Creating a Notification for your Route Creating Alert Notification Saving Map View Saving & Editing Cameras Modifying Route to avoid Closure
Signing up with 511 Alberta
- Visit 511 Alberta and select ‘Sign up’ from the menu options in the top right corner.
- You can now sign up with either your email or phone number.
- Enter your information and click ‘Sign up’ button. Verify your account by clicking on the confirmation link that will be sent to your email or SMS.
Creating & Saving a Customized Route
- Log in to 511 Alberta.
- Enter your start and end locations by typing the addresses into the address fields. Alternatively, you may also right click on the map, select a location from the available options, and select whether the location will be the start or end of your trip. Once you have entered the route locations, click ‘Drive’.
- Review the routes generated and select the one that suits you best. If none of the routes provided are satisfactory, you can select the route on the map and drag it accordingly.
- When done, enter a name for your route and click ‘Save’. You will be presented with the option to create a notification for the route you just created.
Creating a Notification for your Route
- Log in to 511 Alberta.
- In the Manage My Routes table, find the route that you previously saved that you would like to create a notification for and click ‘Create Route Notification’.
- A route notification modal will popup with the default notifications settings for your route. Click ‘Save’ if you wish to use these default settings.
- If you wish to change the default settings, press ‘Edit’ and proceed to the Manage Notification page.
Creating Alert Notification
- Log in to 511 Alberta.
- In the "My Routes & Notifications" page, select ‘My Alert Notification’.
- Fill the required fields and click ‘Subscribe to Emergency Alert’.
Saving Map View
By clicking on the 'Save' icon at the top of the map, you can save your current map view. You can return to this view at anytime by clicking on the 'location' icon.Saving & Editing Cameras
- Log in to 511 Alberta.
- Select the cameras checkbox in the map legend.
- Select a camera by clicking the camera icon and click ‘My Cameras’ button. Select the camera view you want the camera to be added to. Create a custom camera view by clicking 'New Camera View'.
- To view and edit your saved cameras, go to My Cameras.
- In Manage My Cameras page, click on the 'Manage Camera Views' to add, modify or delete a camera view.
- To enter a custom nickname for your saved camera, simply type your desired nickname into the camera nickname field.
Modifying Route to avoid Closure
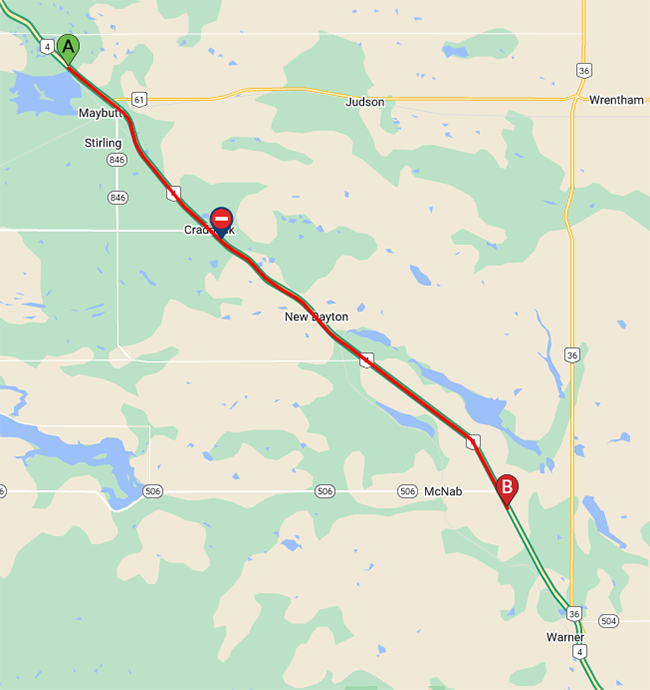
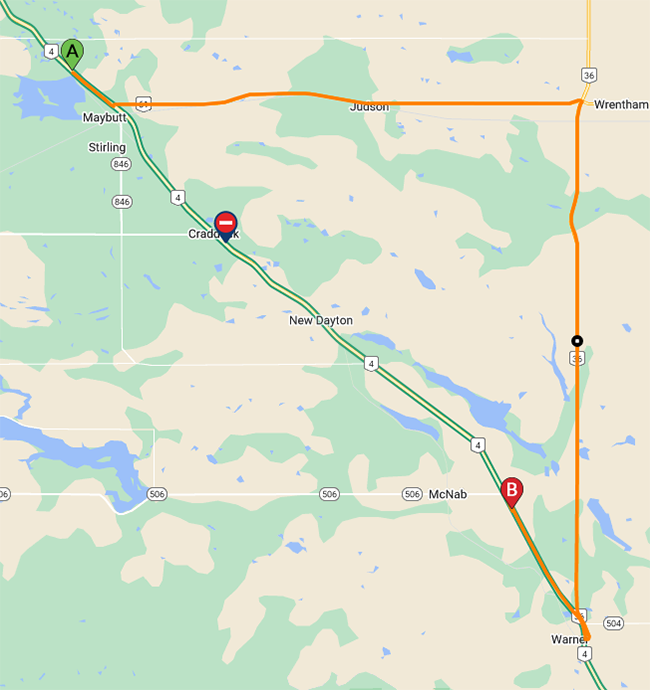
Click on the route segment near the closure and drag the waypoint away from the closure. More than one waypoint may be needed to avoid the closure.
Route with Closure

Using waypoint to route around Closure
